Chapter 4 FTP
Using FTP in Netscape
Using FTP in Netscape
The biggest use for FTP is the downloading of files.
These files often range from little screen savers to Operating Systems
such as Linux. In this section I will take you through
downloading a newer version of netscape.
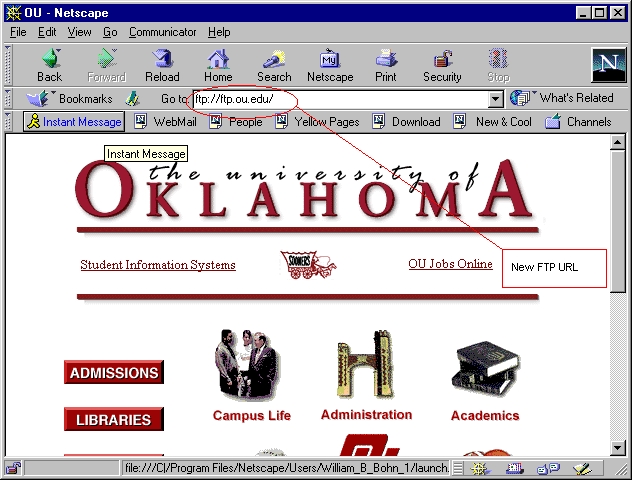
Step 1: pointing your browser to an FTP location.
In this example we will use the OU FTP server.
I will assume everybody starts at www.ou.edu. Now as indicated by the arrow
enter the FTP address.
The new FTP Address:
Step 2: Now that we are at the OU FTP site lets examine this page and some of it attributes.
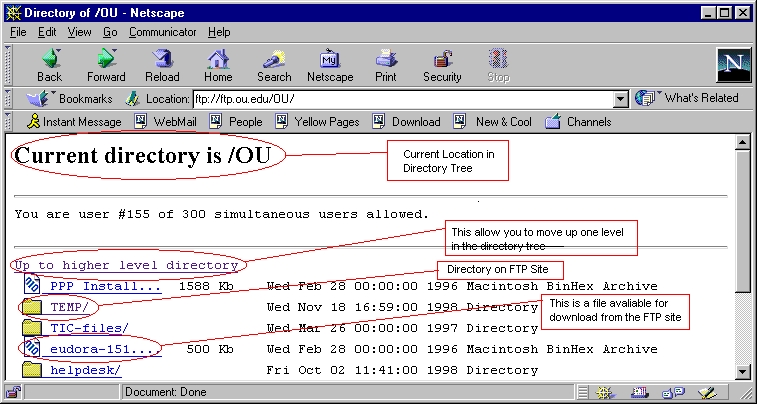
Note: For explanation of Directory Tree look in the Glossary of Terms.
Step 3: Download the file. To download a file simply click on the specific file you wish to posses. This will bring up the standard save file screen. Just simply enter the appropriate information and click save.

Step 4: Watch your file download. That is all there is to downloading FTP files
2. Uploading your
Web Page.
This is one of the nice things communicator does
to help you publish a web page. It automates the publishing process
about as far as you can. I have included a few screen shots and some
simple steps to follow.
Step 1: Click the publish button on the composer tool bar. It will bring up the following screen.
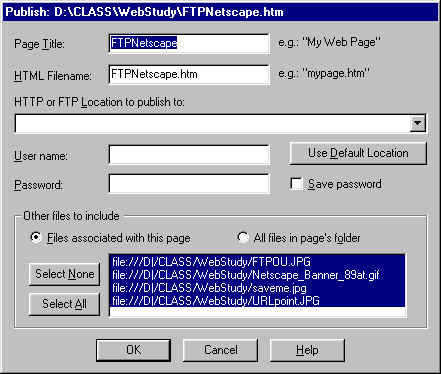
Step 2: Fill in all the relevant information.
Page Title: This will be what you want your page to be called.
HTML Filename: This will be the *.htm file created on the web server if
it is your home page home.htm is good.
HTTP or FTP Location to publish to: This will be your web server I have
listed ou's Faculty and Student space in
the Glossary of Terms.
User Name: This is what the school has given you to Identify yourself to
the web server.
Password: This is a secret password given to you by the school to obtain
access to their server.
Step 3: Click OK
Back | Forward | FTP Contents